Hey there, fellow homebodies and comfort crusaders! Ever find yourself basking in the gentle glow of your downlights, only to feel a phantom chill creeping in from… well, everywhere else? Or perhaps you’ve noticed those energy bills doing a little jig that’s just a tad too enthusiastic? It might be time to chat about something often overlooked, yet incredibly important for that cozy, energy-efficient vibe we all crave: insulation around your downlights.
Think of your home as your personal sanctuary, your Netflix binge-watching headquarters, your sourdough starter’s cozy abode. We meticulously choose the plushiest throws, the perfect playlist for every mood, and that artisanal coffee maker that whispers promises of barista-level brews. Yet, beneath the surface of all this curated comfort, there's a silent battle being waged against heat loss. And guess where some of the most prolific escape routes are? Yep, those sleek little downlights that stud your ceilings.
It’s kind of like wearing a fabulous cashmere sweater but forgetting to zip up your jacket on a blustery day. The warmth is there, but it’s making a break for it! This article is your gentle nudge, your friendly reminder, to give your downlights a little hug of insulation. It’s not a high-stakes DIY drama; it’s a simple, effective way to elevate your home’s comfort and give your wallet a much-needed breather. So, grab a cuppa, get comfy, and let’s dive into the wonderful world of downlight insulation.
The Downlight Dilemma: Why Should We Care?
Let's get real for a sec. Downlights, those chic recessed fixtures that provide such lovely ambient lighting, are fantastic. They’re modern, they’re understated, and they don’t hog precious ceiling space like those old-school chandeliers. They’re the minimalist’s dream lighting solution. But here’s the rub: they create openings in your ceiling, which is essentially the lid of your insulated box. Think of it like a perfectly formed hole in a thermos – not ideal for keeping things toasty!
These little gaps, even if they seem minuscule, can be significant culprits in your home's thermal performance. Heat, being the naturally wanderlust-filled element that it is, will always seek the path of least resistance. And often, that path leads straight out through those uninsulated downlight holes. This is particularly true if your downlights are installed in the ceiling of a room below an unheated attic or loft space.
In the grand scheme of things, it’s a bit like leaving the back door ajar when you’re trying to heat your entire house. You’re essentially paying to heat the great outdoors, which, while lovely in concept, isn’t exactly conducive to a cozy evening watching your favorite period drama. This wasted energy translates directly into higher heating bills, and in summer, it works in reverse, allowing that precious cool air to escape and warm air to seep in.
Beyond the energy bill, there’s the comfort factor. Drafts, cold spots, and uneven temperatures are the arch-nemeses of hygge. You know, that Danish concept of cozy contentment and well-being? Well, uninsulated downlights are the polar opposite of hygge. They’re the uninvited guests at your comfort party, silently sabotaging your efforts to create a perfectly temperate haven. We’re aiming for that ‘just right’ Goldilocks temperature, not the ‘brrr, I need an extra blanket’ situation.
The Science-y Bit (But Make It Fun!)
So, how does this heat leakage actually happen? It’s a combination of two main culprits: conduction and convection. Conduction is like the heat’s direct handshake with the surrounding materials. It transfers from warmer areas to cooler areas through physical contact. In the case of downlights, the heat from your warm living space can conduct through the fixture and then into the cooler attic space.
Convection, on the other hand, is all about air movement. Warm air is less dense and tends to rise. When there’s an opening, like around your downlights, warm air from your room can escape upwards, while cooler air from above can be drawn down. It’s like a tiny, involuntary ventilation system that’s working against you. This constant exchange of air can create noticeable drafts and cold spots, especially near the fixtures themselves.
Think of it like this: imagine your home is a giant, warm hug. Downlights without proper insulation are like little windows in that hug, letting the warmth slip away. Adding insulation is like zipping up that hug nice and tight, keeping all the good stuff (heat) exactly where you want it.
The Hero We Didn't Know We Needed: Insulation Hoods
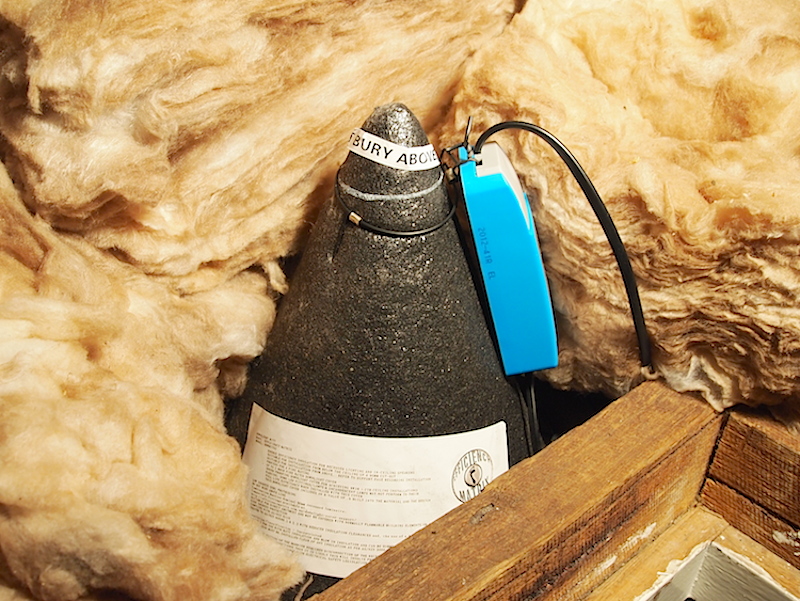
Fear not, for there are simple solutions to this chilly conundrum! The most common and effective remedy is the use of insulation hoods or covers specifically designed for downlights. These are essentially barriers that sit over or around your downlight fixtures, preventing that unwanted heat transfer and air leakage.
These ingenious little contraptions come in various shapes and sizes, often made from fire-resistant materials like fibreglass or specialized flexible fabrics. They create a sealed pocket of air around the downlight, drastically reducing both conduction and convection. It’s like giving your downlights their own personal thermal blanket!
The key here is to ensure the hood is the right size for your specific downlight and that it creates a good seal against the ceiling. You want to minimize any gaps where air can sneak in or out. Think of it as a bespoke tailor fitting a suit for your downlight – snug and perfect!
Some hoods are designed to be placed directly over the fitting from the attic side, while others can be installed from below. The choice often depends on your attic access and the type of downlight you have. Regardless of the method, the principle remains the same: create a barrier.

Types of Downlight Insulation
There are a few main types you’ll encounter:
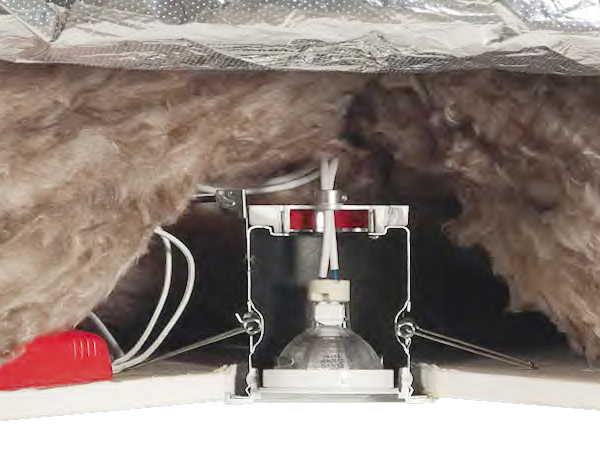
- Fibreglass Hoods: These are rigid, bowl-shaped covers that sit over the downlight. They’re durable and offer excellent thermal resistance.
- Flexible Fabric Covers: Made from fire-retardant materials, these are often more adaptable and easier to fit around complex ceiling structures. They essentially form a snug bag around the fitting.
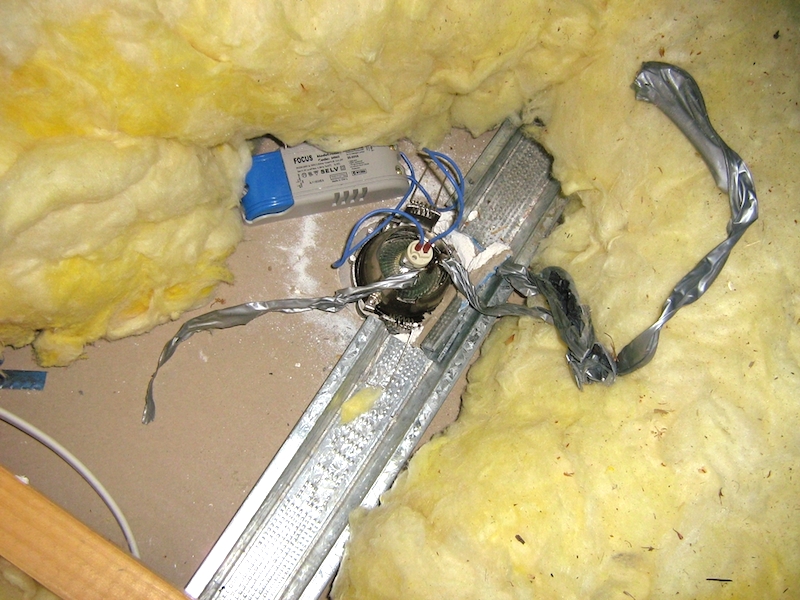
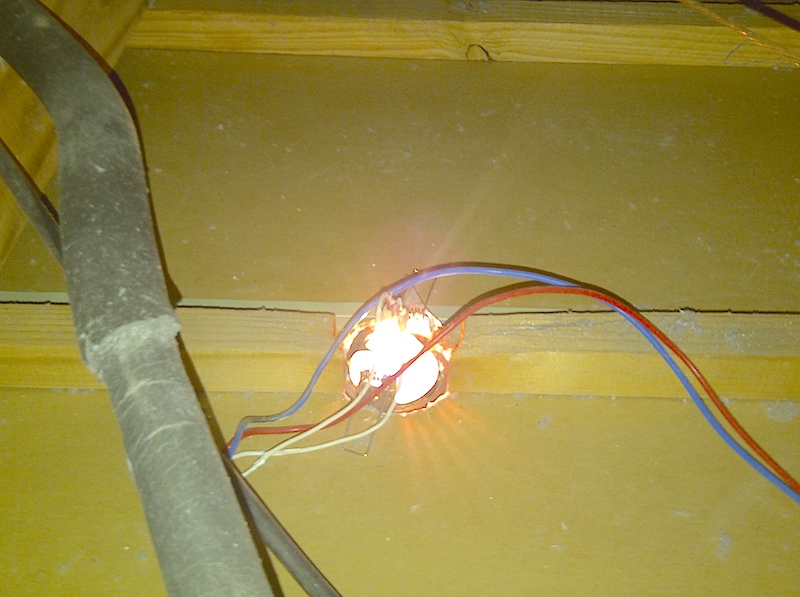
- DIY Solutions (with caution!): While tempting, be extremely careful with DIY insulation. Always prioritize fire safety. Using regular insulation batts directly against a downlight is a big no-no, as many modern LED downlights still generate some heat and could pose a fire risk. Specialized products are designed with this in mind.
A fun fact: The early versions of insulation were pretty rudimentary. Think layers of straw, animal hides, and even mud! We’ve come a long way, but the core principle of trapping air to resist heat flow remains the same. Our modern insulation hoods are a testament to that evolutionary journey.
Installation: A Gentle Undertaking
Now, for the practical part. Installing downlight insulation is generally a straightforward process, but it requires a bit of care and, importantly, safety precautions. If you’re not comfortable working in confined spaces like attics or dealing with electrical fixtures, it’s always best to call in a professional. But for those who are handy and willing, here’s a general guide:
Step-by-Step Guide (The Easy-Peasy Version)
- Safety First! Ensure the power to the relevant light circuits is switched off at the breaker box. Double-check with a voltage tester if you’re unsure. Don’t be a hero; safety is paramount.
- Attic Access (if applicable): If you’re working from the attic, clear any insulation or debris around the downlight so you have a clear working area.
- Choose Your Hood: Select the appropriate insulation hood for your downlight type and size.
- Position the Hood: Gently place the hood over the downlight fitting. For rigid hoods, ensure it sits flush against the ceiling. For flexible covers, ensure they encompass the entire fitting and are secured according to the manufacturer’s instructions.
- Seal the Deal: Make sure there are no significant gaps between the hood and the ceiling. Some hoods come with tapes or clips to help with sealing.
- Restore Insulation (if removed): If you moved attic insulation, carefully replace it around the exterior of the insulation hood, ensuring you don’t compress it.
- Power Up and Test: Switch the power back on and test the lights.
Important Note: Always follow the manufacturer’s instructions for the specific insulation hood you are using. They are designed with specific safety and performance guidelines.
It’s kind of like performing a spa treatment for your ceiling! You’re tucking in those little light fixtures, making sure they’re cozy and don’t have to work overtime to keep the house warm. And let’s be honest, who doesn’t love a good spa day?
A Word on LED Downlights
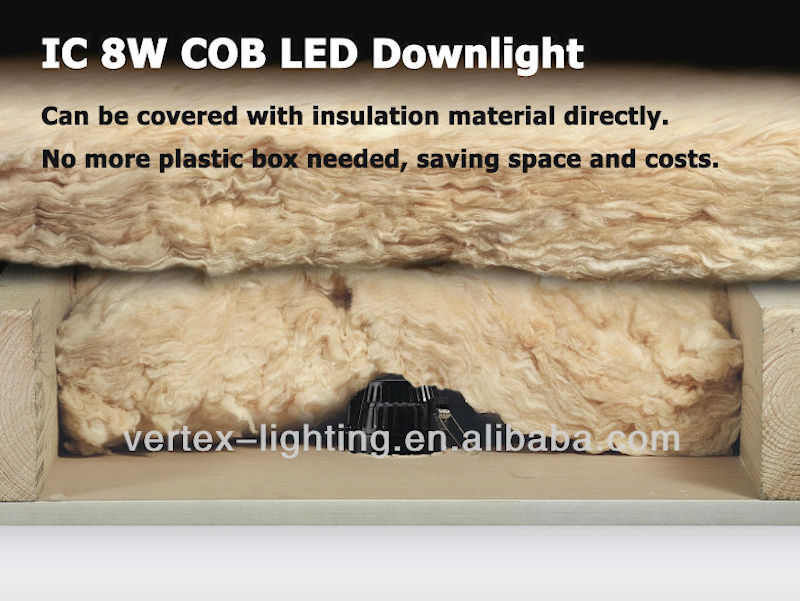
This is a great time to mention LED downlights. They are significantly more energy-efficient and produce much less heat than their halogen or incandescent predecessors. This makes them a safer and more sustainable choice overall. If you still have older, heat-generating bulbs in your downlights, consider making the switch to LEDs. It’s a win-win: lower energy bills and a safer home environment, which then makes adding insulation even more beneficial!
For LED downlights, it's generally safe to use most types of insulation hoods. However, always check the manufacturer’s guidelines for both your downlight and the insulation product. Some very high-powered LEDs might still generate a bit more heat than standard ones, so a quick check never hurt anyone.
The Cultural Cachet of a Cozy Home
The desire for a warm, comfortable home is as old as, well, the desire for warmth and comfort! From the ancient Romans with their underfloor heating systems (hypocausts!) to the Vikings building turf-roofed longhouses, humans have always been ingenious at creating sheltered, cozy environments.
Think about it: the hearth in a medieval castle, the snug parlours of Victorian homes, the mid-century modern living rooms designed for intimate gatherings. The concept of a “sanctuary” – a place of peace, warmth, and security – is deeply ingrained in our cultural DNA. Insulation around downlights is just a modern, slightly more technical, iteration of that age-old pursuit.
In Japan, the concept of 'wabi-sabi' embraces the beauty of imperfection and transience, often finding comfort in simple, natural elements. While downlights are a far cry from ancient tatami mats, the principle of creating a peaceful, comfortable space for reflection and relaxation resonates. A well-insulated home, free from annoying drafts and energy waste, contributes to that sense of calm and well-being.
And let’s not forget the sheer joy of a movie night, a board game marathon, or a quiet evening with a book, all bathed in the warm, inviting glow of perfectly lit, and perfectly insulated, downlights. It’s about creating the backdrop for life’s best moments. It's about making your home a place you love to be in, not just a place you live.

The Ripple Effect: Beyond Energy Bills
The benefits of insulating around your downlights extend beyond just saving a few quid on your energy bills (though that's a pretty sweet perk!). A properly insulated home is a more comfortable home. You’ll notice fewer drafts, more consistent temperatures from room to room, and a general sense of coziness that’s hard to put a price on.
It also contributes to a healthier home environment by reducing the potential for condensation and mould growth, which can be exacerbated by cold surfaces and air leaks. Happy home, happy life, right?
Furthermore, improving your home’s energy efficiency is a responsible choice for the planet. By reducing energy consumption, you’re reducing your carbon footprint. It’s a small step, but collectively, these steps make a big difference. It’s like being a little superhero for your home and the environment, all while enjoying better comfort. Who knew being cozy could be so virtuous?
A Final Cozy Thought
So, there you have it. Insulation around downlights. It might sound a bit niche, a bit technical, but in reality, it’s about enhancing the fundamental comfort and efficiency of your most cherished space – your home. It’s about those subtle improvements that make a big difference in your daily life.
Think about your morning routine. That first cup of coffee enjoyed in a room that feels perfectly warm, not slightly chilly near the ceiling. Or that evening unwinding session where the lighting is just right, and the temperature is consistently comfortable. These little moments, amplified by a well-insulated home, contribute to a greater sense of well-being and peace.
It’s a reminder that sometimes, the most impactful changes are the ones we don’t see. They’re the quiet guardians of our comfort, working diligently behind the scenes to keep us warm, save us energy, and make our homes the ultimate havens. So, next time you’re admiring your lovely downlights, give a little thought to the insulation that’s keeping them (and you!) cozy. It’s a small detail that truly lights up your life, in more ways than one.